Whether you have launched your own website or sell items in popular e-commerce sites like Ebay and Etsy, the images you show to the public are just as important as your text descriptions. Customers are constantly being bombarded by hundred of pictures per page and only click on the ones that they find most relevant, high-quality, and eye-catching. Since, they can’t directly try the product, a picture gives them a glimpse of the physical attributes of the product and influences a great deal their decision to buy it or not.
Thus, having clear, great-looking and quality relevant pictures is a must to get more customers to buy your products. The task may sound overwhelming for some, especially those who don’t have experience in taking shots of their own but the good news is that, with a little practice and a few tips, you will be able to mimic the results of a professional photographer minus the costs.
Here are 6 tips to get better looking photos for your e-commerce store
1. Select the appropriate tools and equipment.

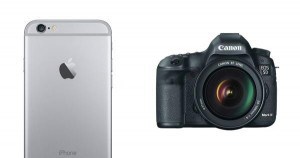
iPhone 6 camera, for example, functions 8-mega pixels which are enough to take good quality pictures.
In case you are on a strict budget, there is no need to buy a camera that costs a few hundred to a thousand dollars. Your smartphone’s camera may prove out to be sufficient, especially if it’s of the latest version. iPhone 6 camera, for example, functions 8-mega pixels which are enough to take good quality pictures. You can also enhance its functionality by attaching extras like for example extra lenses and tripods.
In case your budget allows you to purchase more expensive equipment, look for a flexible interchangeable or digital lens camera as it’s considered one of the greatest options for taking high-quality shots with minimal fuss. Both of these types of lenses are usually equipped with a kit lenses created for offering zoom flexibility. For even better results, you may want to invest in a targeted micro-lens or wide aperture portrait lens.
If the above options sound too pricey for you, you can also invest in a regular point-and-shoot camera, which typically costs less than DSLR and interchangeable lens types. These cameras usually cost from anywhere between €200-€600 depending on model extras and the manufacturer. Models with a wider aperture, usually exceed €300 but are really worth the investment as they produce higher quality results and have a bunch of useful extra functions like manual focus control settings, wide zoom range, and macro-photography picture taking.
Regardless of your choice, you will almost certainly need a tripod, especially if your hands are shaky and you can’t keep them in place for too long. This will ensure that your get a steady angle of the product while you are able to adjust lighting settings.
2. Get to know your camera
There certain types of lenses that gives off an impression that you have used an expensive camera while others are most appropriate for producing novelty results. If you are using a camera to shoot products, using a macro lens is your best bet. In case you experience problems like image blurring or distortion, use your typical lens and re-attach the macro lens.
In case you are using a smartphone camera, get an application that allows you to focus and adjust the settings more easily.
Make sure you don’t use any effects that may distract from the focus of the picture. Blurring the background, for example, is reasonable and will make your product pop, but adding cartoon frames and graphics to make it look more appealing will not serve your original purpose of highlighting your product. You want your product to be the main focal point—not the background or any other secondary elements.
Once you have activated the flash function, select a focus setting which enables you to select a single point in the frame. On Nikon cameras, this setting is called “Single Point”, whereas, on Canon cameras, it’s known as “Manual EF point”. This setting is featured in many cameras of this type DSLRs as well as other types of high-end shoot cameras. It basically enables the automatic focus on a single point that you’ve selected and marks it with a nearly transparent square which is visible through the viewfinder. On smart phones, simply touch the point on-screen to focus.
3. Select the type of your lens: Wide or Standard
By using the point-and-shoot mode, you can expand your lens as far as possible, for the regular shot of a single, stand-alone tool. Make sure you avoid digital zooming, as this may decrease the quality of details in your image. Enable the “macro” mode, in order to capture smaller details that may look blurred with regular mode—this is a feature that has been found in many point-and-shoot cameras
In case you are using a DSLR or an interchangeable lens camera, you have many options. The best and most typical option when shooting for products is to use a longer lens of at least 50 mm, to prevent image distortion. Long lenses are typically better in terms of shooting products, due to the fact that they offer a thinner area of focus and don’t cause much distortion—something that makes it extra useful when your are taking the main pic of the product.
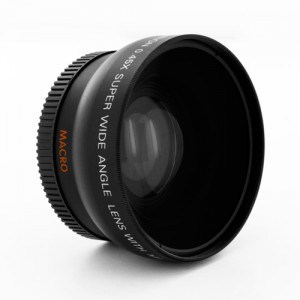
However, you may need to take additional shots that showcase your product “in use”. For this regard, use a wide angle lens which will let you virtually add more space for secondary visual elements e.g. background objects. Don’t overdo it though as you don’t want to redirect the focus to something else besides your main product—anything below 24mm is ideal.
If cost is not an issue for you, you may have to invest in a macro lens to attach to your DSLR camera. They are one of the best options for zooming in the details of your product.
4. Select the background

In case you want to show your tea cups, it would be most appropriate to use them on a table or kitchen background
Try to demonstrate your product in a background that’s relevant of its ise— e.g. in case you want to show your tea cups, it would be most appropriate to use them on a table or kitchen background. If you want the lighting to look natural but not overwhelming, expose a table to the light of a window on a cloudy or mildly sunny day with transparent curtains. This should create and give the impression of a naturally dimmed background without looking too much. The placement also plays a role and depends on the type of the product you are trying to sell. If for example you are selling a traditional handmade product, use your typical, rustic table and place the product on it to complete the rustic look. It’s best at this stage to turn off other artificial lights that will mess up with the natural lighting of your image. Then you can use mirrors to reflect the light from your window to your target product. You can invest in professional reflectors, but since this cost too much, some regular vanity mirrors and a poster board will be sufficient. Keep in mind that the lighting of the product should be a tone darker than the lighting from your source to showcase your product at its best.
For non-prime pics, it’s best to use a wider lens (24mm to 50mm) and match your product with visual elements that enhance its nature, without overshadowing it. For example, to shoot a vase, you may add water and flowers (after all this is its main purpose, right??), rather than just shooting it empty.
5. Studio lighting settings
If you want to create a studio setting, you can create a background by using a big piece of paper and a bit of duct tape. Set the paper carefully to form a slight angle to prevent harsh angles appear in your shot. For more dynamic lighting effects, turn off irrelevant lights and shadow your windows. Take two lamps of the same type of bulb, and place ant changing angles. (20-watt bulbs work fine for most cases but you can virtually use any type, as long as it’s of the same power). You can’t for example use LED and fluorescent light at the same time.
For avoiding glaring and harsh shadow lighting, use a large piece of paper (8.5 to 11 inches) between the bulb and your target product. Be careful not to attach the paper exactly over the bulb as this may start a fire. What you should do instead is to ask someone to hold it steadily or place clamps between the bulb and the product. To make the lighting look less harsh, you can also reflect the light to an a white reflective area e.g. the posterboard as mentioned earlier and aim the reflection angle towards your target product.
Using a long lens is your best option as it takes out the harsh edges of your background.6. Don’t overdo it with editing.
6. Don’t overdo it with editing.
There are many basic programs all over the net that can help you manually edit your pics, and most of them are already found in your device or you can use them for free or a very low cost. You really don’t need to manipulate your photos through heavier products like Photoshop, any software that lets you balance the brightness, “cut” unwanted elements and correct lighting will do. Auto-fix and retro filters might be fine for other purposes, but, in this case, they will ruin the natural lighting effect you were trying to achieve in the first place. Also, don’t give in to the temptation of cutting and pasting your image to a model’s hand, it looks fake and ridiculous.


